Before starting to program, we need to prepare our development environment, but there is no a document for developers to step-by-step install IDE, SDK, and plugins to start there, and that this article written about.
for "How to install JenOS configuration Dialog Editor", please jump to STEP 6
JN5169 Start (2) is about how to program your .bin into your JN516x chip.
STEP 0. download from NXP website.
we need 4 files download from NXP
1. JN-SW- 4141 BeyondStudio for NXP (not LOWER then v13.08)
2. JN-SW- 4168 JN516x SDK
3. JN-SW- 4107 JN51xx Production Flash Programmer
4. JN-SW- 1171 An example code for JN5169
STEP 1. install BeyondStudio for NXP
download from NXP website and unzip
press right button and (A) (excution as system administrator) and "agree"

then press "next" until "choose install location".
I choose default location in
C: \NXP\bstudio_nxp\
and press "install"
start installing.....
installation complete
in C:\ we can see file of BeyondStudio for NXP
STEP 2. install JN-SW-4168 SDK for JN516X
download from the same webpage and unzip it.
press right button and (A) (excution as system administrator) and "agree"
then press "next" until "choose install location".
I choose default location in
C: \NXP\bstudio_nxp\
and press "install"

installation complete

and now we can see in
C:\NXP\bstudio_nxp\sdk
It will be like this

STEP 2.install JN51xx Production Flash Programmer
download from here and unzip

press right button and (A) (excution as system administrator) and "agree"

then press "next" until "choose install location".
I choose default location in
C: \NXP\ProductionFlashProgrammer

After installation completed, in C:\NXP\ProductionFlashProgrammer
we can see:

STEP 3. download JN-SW- 3098 (An example code for JN5169)
download from here and unzip it


STEP 4. import example code
(1) copy "JN-AN-1171-ZigBee-LightLink-Demo" folder
C:\..\..\..\JN-AN-1171\JN-AN-1171-ZigBee-LightLink-Demo
to C:\NXP\bstudio_nxp\workspace

(2) doudle press "bstudio_nxp.exe" to start beyond studio

select workspace at
C:\NXP\bstudio_nxp\workspace and press "OK"

(3) check BeyondStudio edition
press "help" -> "about BeyondStudio for NXP"
then we will see: Build 1308

(4) import project
press "file" -> "import"
select "General"->"Existing projects into Workspace"
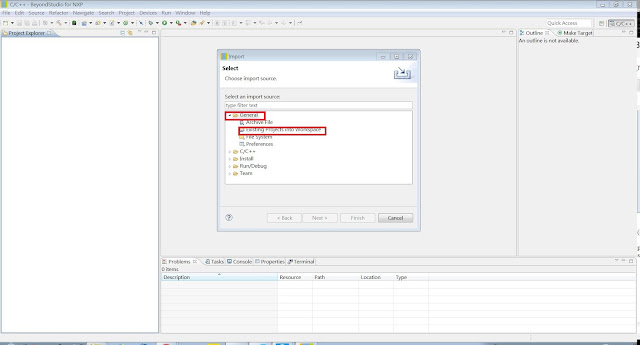
press "select root directory"->"browse"
and select JN-AN-1171 in workspace

select "JN-AN-1171-ZigBee-LightLink-Demo" folder and press "finish"

now we successfully import in project

STEP 5.compile example code
press the hammer button and select a project
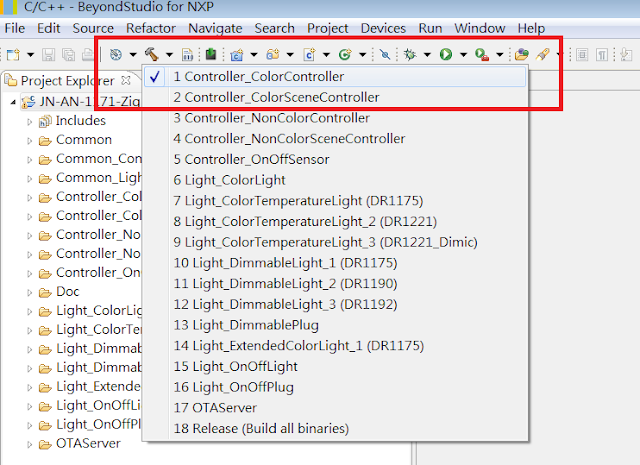
start building
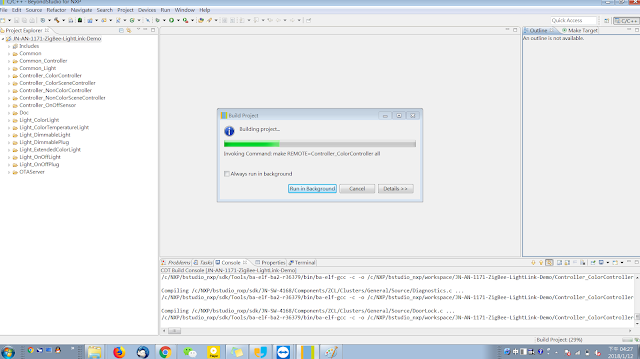
finish

STEP 6. install Jennic configuration Editor tool
JN51XX use a kind of RTOS called "JenOS", and "JenOS" use a graphical interface
configuration Dialog
to register hardware interrupts, timers...etc.
before we install it, if we press any of ".oscfgdiag" , we will see:

and we have to install a eclipse plugin to let it be a graphical interface
this installer is already in JN-SW-4168
what we need to do is installing it into BeyondStudio
open BeyondStudio, and press "Help"->"install new software"

press "Add..."->"Local..."

select C:\NXP\bstudio_nxp\sdk\JN-SW-4168\Tools\Eclipse_plugins\com.nxp.sdk.update_site

and you will see "Jennic ZBPro SDK" ->"Jennic configuration Editor"
select all and press "next"

accept the agreement and press "finish"

start installing...
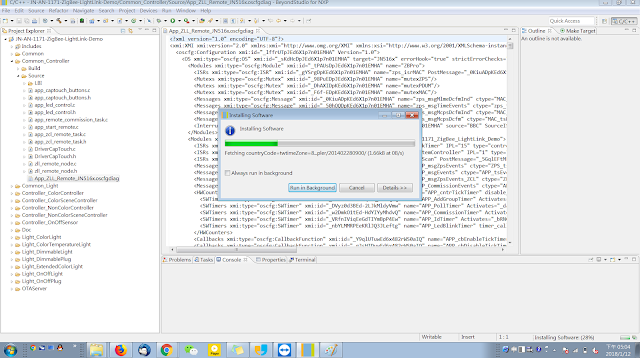
After installation completed, you have to restart BeyondStudio
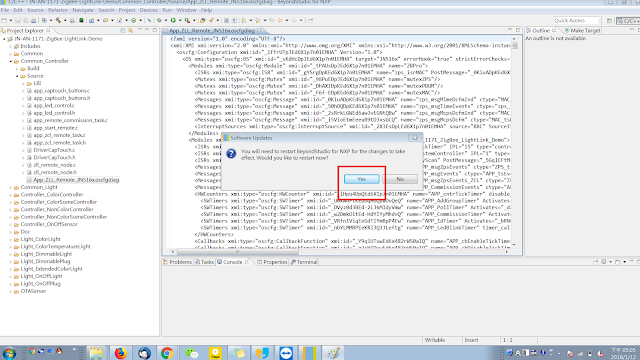
After restart, select any ".oscfgdiag" we will see:

Now we successfully compile the example code and make sure that our Development Environment is completed prepared.
reference:
1.NXP website
https://www.nxp.com/products/wireless-connectivity/proprietary-ieee-802.15.4-based/zigbee/zigbee-light-link:ZIGBEE-LIGHT-LINK
2. BeyondStudio for NXP Installation and User Guide
3. ZigBee Cluster Library User Guide (for ZLL/HA)
4. JN-UG-3099
5.JN-SW- 3098 Document


Nice! It help me a lot
回覆刪除作者已經移除這則留言。
回覆刪除